Wire twist tutorial
Here's my attempt at a tutorial--strange, I create "how to's" at work but usually I'm using screen shots and simple computer instructions...this is a little different.
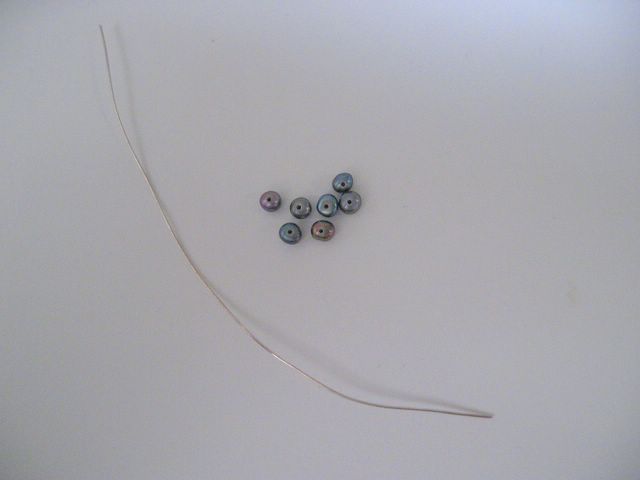
Start off with a length of thin gauge wire (I'd say 26 or 28 gauge is good to work with but then again, I'm not much of a wire twister) and some beads. I'm sure there are formulas on how long the wire should be (length of finished piece, how tight the twists are, etc) but I don't know any--eep! I just used about 12 inches of 30 gauge fine silver wire* and some small pearls.

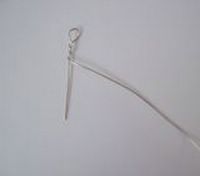
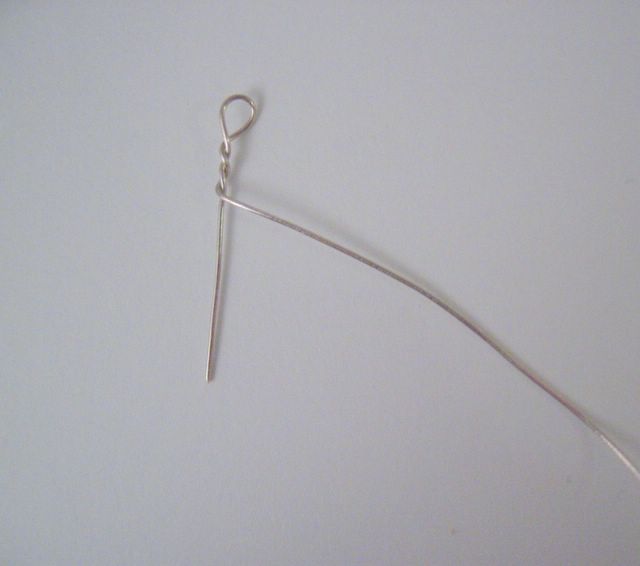
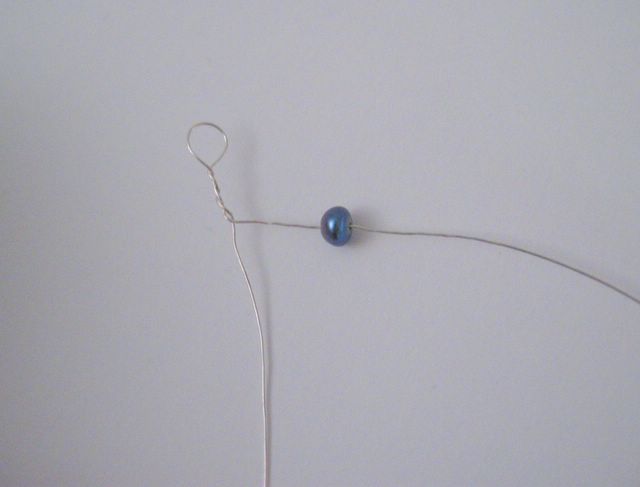
This is a fakey shot of the beginning so the "stem" is shorter than the original. Determine how long the stem will be, create a loop and wrap the longer piece of wire around the stem (tight or loose, whichever you prefer) as far down as you want the first "branch".
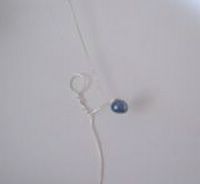
String a bead on the longer piece of wire and stop at a point where you're happy with the branch length.

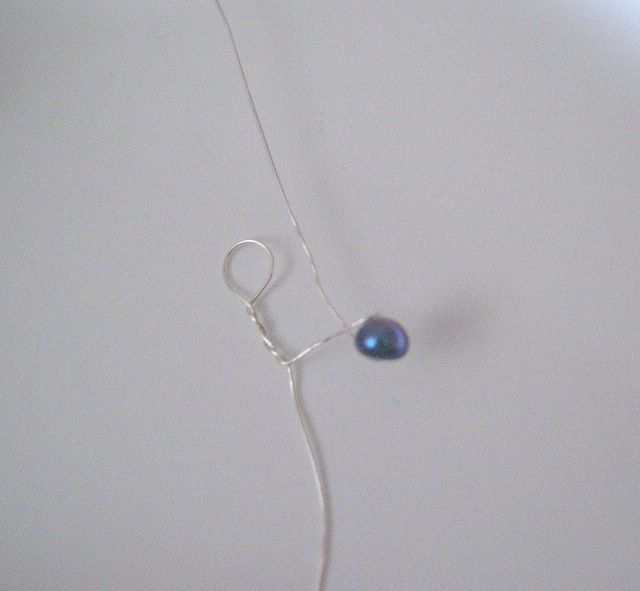
Bend the longer wire and start wrapping it towards the stem. The picture below doesn't show it well but if you hold the longer wire and branch between two fingers (of say your left hand) and twist the bead with your right hand it's goes pretty fast. You don't have to try to wrap the whole long piece of wire around the little branch.
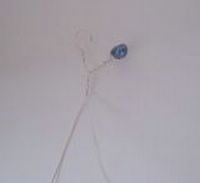
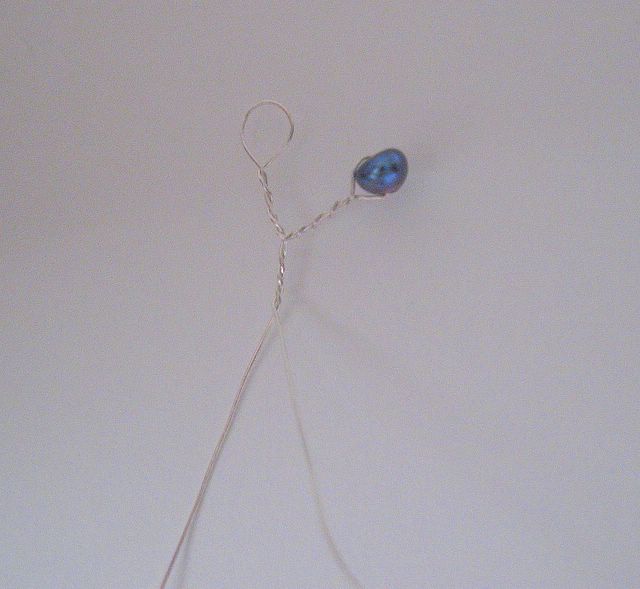
When you get to the base of the branch wrap the longer wire around the stem to the point where you want a new branch.

Start a new branch, same as the first branch.

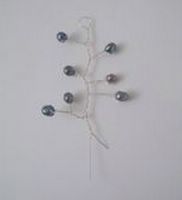
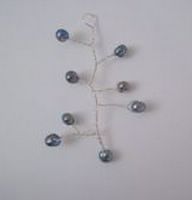
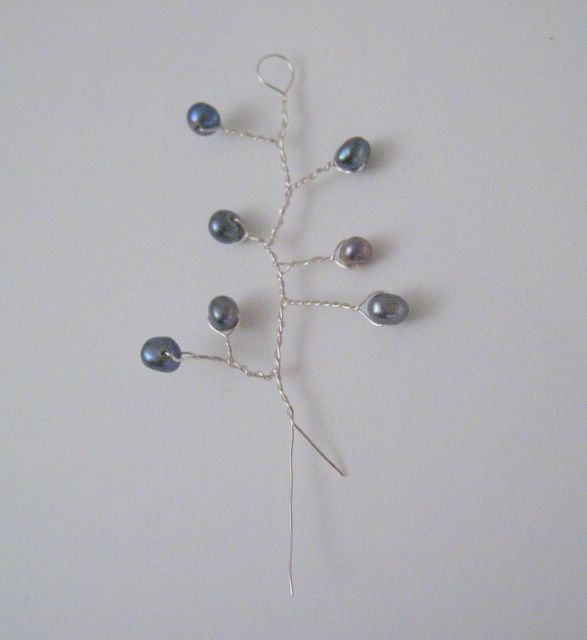
Pretty soon you'll have a bunch of branches, smaller branches shooting off of bigger branches...
Think about ending before you run out of the longer wire--I didn't and ended up with a long stem and short wire. Whoops!
I ended it by cutting off the excess ex-longer wire (or what turned out to be the shorter wire) and stringing my last bead on the stem and twisting the stem wire back up itself. Apologies if that doesn't make sense, maybe a closer look at the last bead would help...maybe not.
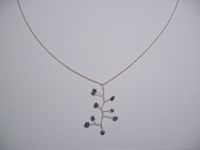
Ta-da! String on a chain for a necklace, attach to earwires, make a pin, anything. Hehe, looks better from far away.
Wow, this "how to" was a lot harder than the ones I create for work. I don't think I'm very good at 'splainin' this...it's a lot easier when all you have to say is "click next, right click here, select this...." If you have any questions let me know and I'll try to clarify my mumbo-jumbo :)
*For most pieces I use sterling silver which is 92.5% silver (as opposed to fine silver which is 99% silver) . Fine silver is softer than sterling and can wear out more easily (on the plus side it doesn't tarnish like sterling) but sometimes I can't find thin gauge wire in sterling so I'll go with fine--I used 30 gauge because I ran out of 28.
Start off with a length of thin gauge wire (I'd say 26 or 28 gauge is good to work with but then again, I'm not much of a wire twister) and some beads. I'm sure there are formulas on how long the wire should be (length of finished piece, how tight the twists are, etc) but I don't know any--eep! I just used about 12 inches of 30 gauge fine silver wire* and some small pearls.
This is a fakey shot of the beginning so the "stem" is shorter than the original. Determine how long the stem will be, create a loop and wrap the longer piece of wire around the stem (tight or loose, whichever you prefer) as far down as you want the first "branch".
String a bead on the longer piece of wire and stop at a point where you're happy with the branch length.
Bend the longer wire and start wrapping it towards the stem. The picture below doesn't show it well but if you hold the longer wire and branch between two fingers (of say your left hand) and twist the bead with your right hand it's goes pretty fast. You don't have to try to wrap the whole long piece of wire around the little branch.
When you get to the base of the branch wrap the longer wire around the stem to the point where you want a new branch.

Start a new branch, same as the first branch.

Pretty soon you'll have a bunch of branches, smaller branches shooting off of bigger branches...
Think about ending before you run out of the longer wire--I didn't and ended up with a long stem and short wire. Whoops!
I ended it by cutting off the excess ex-longer wire (or what turned out to be the shorter wire) and stringing my last bead on the stem and twisting the stem wire back up itself. Apologies if that doesn't make sense, maybe a closer look at the last bead would help...maybe not.
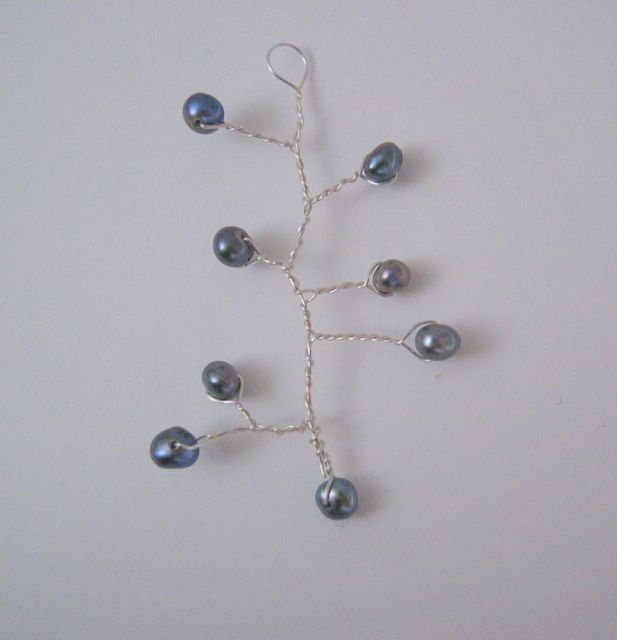
Ta-da! String on a chain for a necklace, attach to earwires, make a pin, anything. Hehe, looks better from far away.

Wow, this "how to" was a lot harder than the ones I create for work. I don't think I'm very good at 'splainin' this...it's a lot easier when all you have to say is "click next, right click here, select this...." If you have any questions let me know and I'll try to clarify my mumbo-jumbo :)
*For most pieces I use sterling silver which is 92.5% silver (as opposed to fine silver which is 99% silver) . Fine silver is softer than sterling and can wear out more easily (on the plus side it doesn't tarnish like sterling) but sometimes I can't find thin gauge wire in sterling so I'll go with fine--I used 30 gauge because I ran out of 28.
posted by Susanne at 8:36 PM
![]()


8 Comments:
This is an awesome tutorial! I've tried to make branch-y type things before and always produced laughable results, so this will be a big help. :)
I love it! Thanks for the tutorial. You made it seem so simple that maybe even I could do it!
You made it look so easy, but I have a feeling mine would not be so beautiful. Thanks!
great turtorial! i would have never thought of doing something like that. thanks for the idea!
great blog btw!! :)
Thanks for this great tutorial Susanne! I love the dangly-stemmy thing you made. Now I'm inspired to try something like that myself!
Great tutorial! :-)
This is fantastic, I can't wait to try. Thanks for the tutorial. I love your blog!
At last!! I couldn't remember where I'd seen this fantastic tutorial. You've created a monster! I've made so many of these, my eyes are wiggly. Please check out the necklace on my blog using this technique
Post a Comment
<< Home